
Why homemade ice cream is worth the extra scoop
Making ice cream at home is more than nostalgia it’s control. You pick the quality of dairy, the sugar level, the mix-ins, and the weird little flavor mashups that commercial brands won’t risk. Plus, mastering a few base techniques means you can improvise wildly and still get a creamy, scoopable result. For these reasons, home ice cream is both creative and practical.
The quick science: what makes ice cream creamy (and what wrecks it)
Creaminess comes from fat, sugar, air (overrun), and small ice crystals; when any of those are off, you get icy, hard ice cream. Commercial stuff uses stabilizers and specialist machines to keep crystals tiny; at home we use eggs, powdered milk, alcohol, or custard bases to mimic that stability. Also, whipping air into the base (or using condensed milk in no-churn recipes) helps achieve scoopable texture without a machine.
What’s trending in flavors right now
In 2025 the big movement is toward global and fruit-forward flavors think mango with chile, ube, and floral pairings like lavender-honey while classics still sell strong. Plant-based and “functional” ice creams (with clean labels or adaptogens) are growing fast, too, so don’t shy from using oat or coconut milk as a base. These trends mean adventurous combos and dairy-free versions are both welcome at your next scoop party.
Tools that actually matter (and what you can skip)
You don’t need an ice-cream machine to make great results, but chilling bowls, using a metal pan for freezing, and a sturdy whisk or food processor help a lot. If you do buy equipment, prioritize a good ice-cream maker or a small food processor for no-churn hacks. Above all, prep and chilling time matter — rush nothing.
No-Churn Vanilla (best beginner recipe)
No-churn recipes are the gateway to homemade ice cream; they’re fast, forgiving, and delicious. Whip 2 cups of heavy cream to stiff peaks, gently fold in one can (400 g) of sweetened condensed milk and a teaspoon of vanilla, then freeze in a metal loaf pan for at least 6 hours. For richer texture, stir once after an hour to break large crystals; serve straight from the freezer and expect a slightly softer melt than churned ice cream.
Double-Dark Chocolate No-Churn (for chocoholics)
If you crave deep chocolate, use good cocoa and consider adding a tablespoon of vodka or coffee liqueur to keep the texture silky alcohol lowers freezing point and stops it from becoming rock hard. Mix melted dark chocolate into a condensed-milk base, fold in whipped cream, and ripple in extra fudge before freezing. The result is intensely chocolatey and scoopable straight from the freezer.
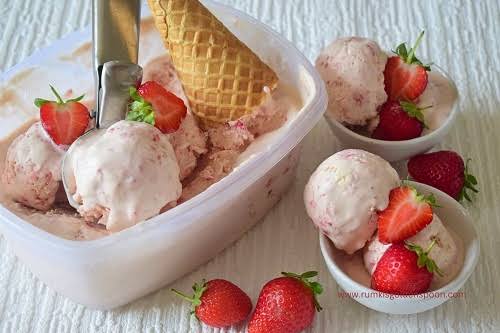
Mango-Chile Sorbet (fruit punch, dairy-free)
For a bright, refreshing option, make a mango puree with lime juice, a touch of sugar, and a pinch of chile powder. Cook briefly to dissolve sugar, cool fully, then churn or freeze and stir frequently for a granular but vibrant sorbet. Fruit sorbets shine because they celebrate pure flavor perfect for summer or as a palate cleanser between heavy courses.
Aquafaba Vanilla (vegan, no-machine)
Aquafaba the chickpea can liquid whips into a meringue-like foam and gives vegan ice cream much of the aeration eggs would. Whip ¾ cup aquafaba with a pinch of cream of tartar to soft peaks, fold into sweetened plant milk blended with vanilla, then freeze. It won’t be identical to dairy custard, but for a vegan, no-egg, no-machine option it’s surprisingly good.
Brown Butter Pistachio (elevated, simple)
Brown the butter carefully until nutty and fragrant, cool slightly, then blend into a custard base or a no-churn condensed-milk mix. Fold in toasted pistachios and a pinch of sea salt for contrast. Brown butter adds caramelized depth that makes a simple pistachio feel gourmet without extra fuss.
- Coffee-Cinnamon Ripple (dessert-shop vibes)
Infuse whole milk with tightly packed coffee grounds or instant espresso, then strain and use in a basic custard base. Create a cinnamon-sugar swirl cooked down to a syrupy consistency and fold through after churning (or before freezing for no-churn). The warmth of cinnamon elevates the coffee into a cozy, grown-up treat.
Quick tips to avoid icy texture
Freeze your container first, chill all components well, and don’t over-aerate the cream too much air makes it fragile and icy later. If you’re going no-churn, include milk powder, a small amount of alcohol, or cornstarch/pudding mix to stabilize crystals if you plan to keep the ice cream longer. Lastly, scoop with a warm spoon or dip to glide through the cold without breaking the structure.
How to add swirls, cookies, and crunchy things
Layering matters: pour half your base into the pan, add a ribbon of sauce, then pour the rest and add chunks on top before freezing. For cookies or brownies, fold in small pieces near the end of mixing so they remain chunk-y. Nuts, brittle, and chocolate chips can sink if too heavy consider stirring 30–60 minutes into the freeze so they suspend better.
Freezer storage and service advice
Homemade ice cream lacks commercial stabilizers, so store it in an airtight container with a piece of parchment pressed on the surface to limit ice crystal formation. Keep it at the back of the freezer where the temperature is most stable and serve within 2–3 weeks for best quality. When ready to serve, transfer to the fridge for 5–10 minutes or use a hot scooping tool for clean, Instagram-ready scoops.
Flavor ideas you can riff on (mix-and-match list)
Start with a base (vanilla custard/no-churn), then pick one protein (peanut butter, tahini), one citrus/fruit, one spice, and one texture (nuts, cookie chunks). Try combinations like orange cardamom + dark chocolate chips, salted tahini + date swirl, or mango + toasted coconut. These frameworks help you create original combos without guessing.
Troubleshooting fast (common problems fixed)
If your ice cream is icy: reblend with a little cream or milk and refreeze; if it’s too hard, add a teaspoon of alcohol or a touch of glucose syrup to the next batch. If it’s grainy, warm slightly and whisk to soften crystals before serving, then consume quickly. For too-soft batches, re-freeze in a metal pan and chill the mixing tools next time.
Final scoop: experiment like a chef, keep notes
Treat every batch like a mini experiment: write down ratios, freeze time, and add-ins so you can repeat the hits. Use high-quality base ingredients for a noticeable difference, but don’t be afraid to use shortcuts like sweetened condensed milk or pudding mix when you need fast results. Above all, have fun your best recipe is the one you’ll actually make again.